It's inevitable that some DIY dyeing experiments don't go as planned - sometimes, the multicolored palette doesn't look as good in real life as it did in your head, or your semisolid color turns out lighter or than intended, or your skein has unfortunate dye spatters or, worse yet, bare spots. Oops!
When bad things happen to good yarn, don't fret - you can always overdye your skeins to cover a multitude of dyeing mishaps. You may even get a prettier color in the process, as adding layers of color can add depth that simply can't (easily) be achieved by a single dye session.
The key to overdyeing is to choose a color that is complementary to the color or colors in your skein - otherwise, you'll just create a big brown mess. Of course, if a big brown mess is what you're going for, go head and overdye that yellow skein of yarn with green! But it would probably be much prettier if you used an orange or red color to overdye it.
When bad things happen to good yarn, don't fret - you can always overdye your skeins to cover a multitude of dyeing mishaps. You may even get a prettier color in the process, as adding layers of color can add depth that simply can't (easily) be achieved by a single dye session.
 |
| My crock pot that's dedicated for dye projects! |
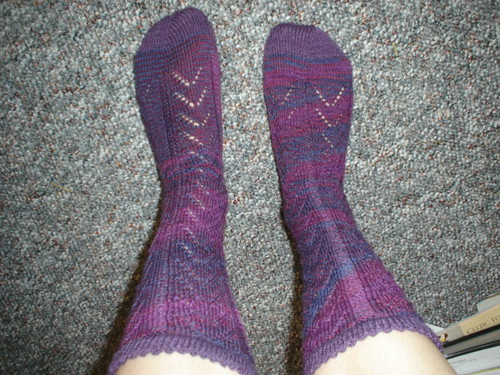
When I dyed yarn at Lorna's Laces, we would frequently overdye mis-dyed skeins of yarn to create one-of-a-kind colorways which almost always ended up coming home from me. In fact, the first time I dyed a multicolored colorway (Mixed Berries), I forgot to add one of the colors to the repeating sequence. Once the dye is set, it's pretty tough to fix such a big oopsie, so we overdyed it with a deep purple and it looked a-MA-zing. I ended up knitting my grandmother a pair of socks with it; you'll have to forgive the poor quality of this photo - this project dates back to 2008 and my photography skills were not so great back then.
The key to overdyeing is to choose a color that is complementary to the color or colors in your skein - otherwise, you'll just create a big brown mess. Of course, if a big brown mess is what you're going for, go head and overdye that yellow skein of yarn with green! But it would probably be much prettier if you used an orange or red color to overdye it.
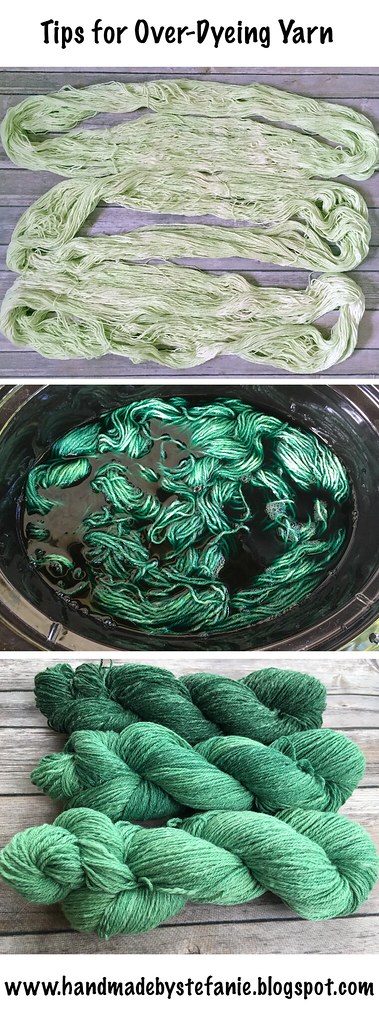
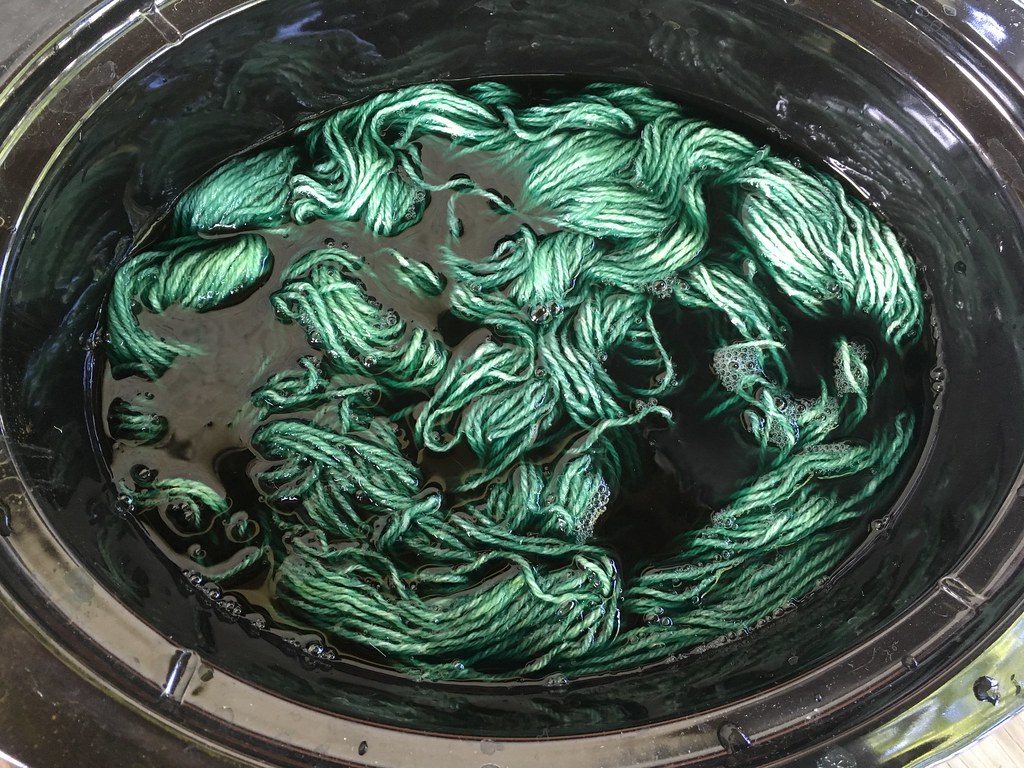
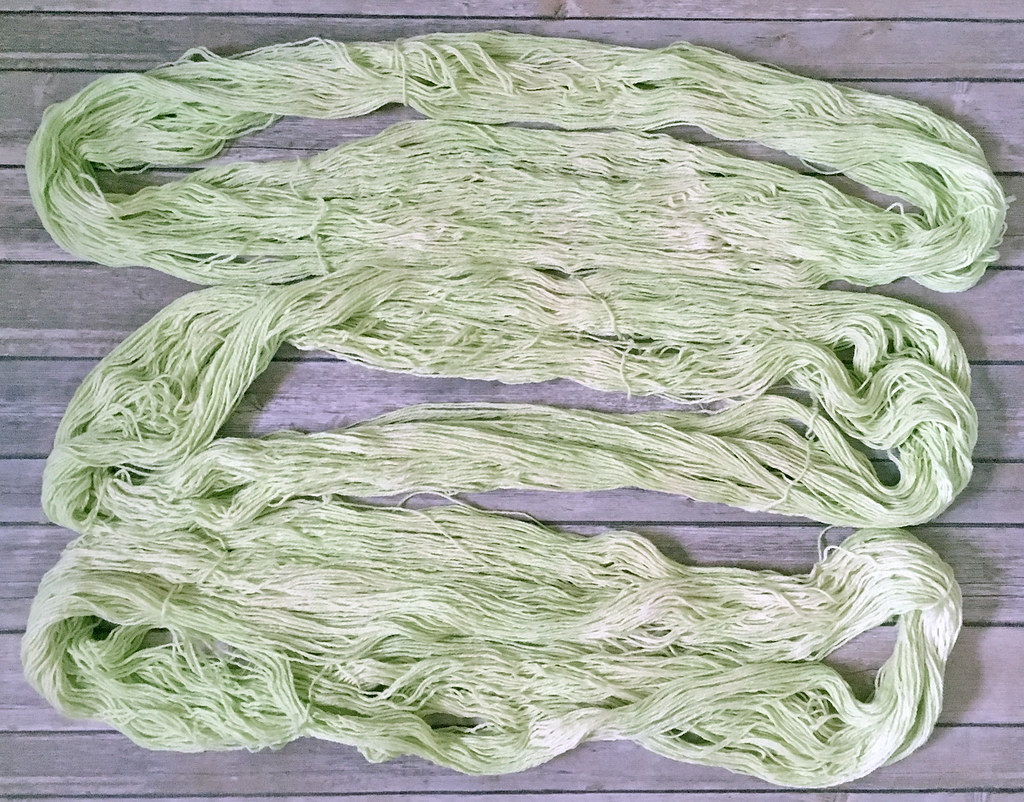
A while back, I dyed these 3 skeins of yarn with Kool-Aid and didn't achieve the full-strength green I was going for. What's more, there were lots of bare spots on the yarn where the dye didn't set properly. While they would probably knit up into a lovely variegated natural-and-baby-green fabric, I would really prefer a deeper hue.
If you want to get a deeper version of the same color (and remember what your original dye recipe was), that's easy - mix your dye at half-strength.
If you want to get a totally different color, that's ok too! Depending on the level of intensity desired, I would mix the dye anywhere between 1/2 - 3/4 strength. If you can spare a little bit of yarn to do a test dye before hand, that will help you adjust the strength accordingly. Of course, if you don't mind the occasional surprise, you can mix up a batch of dye, toss in some yarn, and hope for the best. I do this quite a bit and have yet to be disappointed with the results.
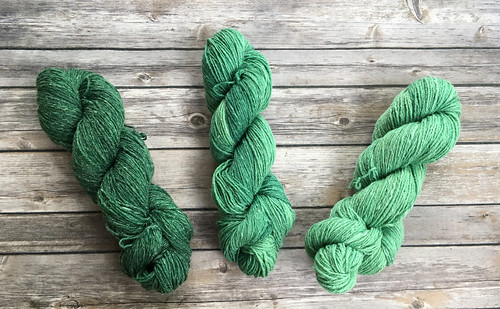
Recently, I attempted a gradient set of skeins using the mis-dyed yarn mentioned above and some Gaywool dye I had on hand (the color I used is Lucerne). I started with the recommended dye recipe on the package for the amount of yarn I wanted to dye (12g) and got a fairly nice green color. From there, I mixed stronger batches of dye for the other two skeins of the gradient. This will only help you if you're using the same kind of dye as me, but here are the water-to-dye ratios I used to overdye my skeins: 12g dye, 10 cups water; 15g dye, 10 cups water; 18g dye, 10 cups water. Basically, I used the same amount of water, but added 3g more of dye each time to get these results:
There are tons of ways to dye yarn; here are some resources to help get you started:
If you want to get a deeper version of the same color (and remember what your original dye recipe was), that's easy - mix your dye at half-strength.
If you want to get a totally different color, that's ok too! Depending on the level of intensity desired, I would mix the dye anywhere between 1/2 - 3/4 strength. If you can spare a little bit of yarn to do a test dye before hand, that will help you adjust the strength accordingly. Of course, if you don't mind the occasional surprise, you can mix up a batch of dye, toss in some yarn, and hope for the best. I do this quite a bit and have yet to be disappointed with the results.
Recently, I attempted a gradient set of skeins using the mis-dyed yarn mentioned above and some Gaywool dye I had on hand (the color I used is Lucerne). I started with the recommended dye recipe on the package for the amount of yarn I wanted to dye (12g) and got a fairly nice green color. From there, I mixed stronger batches of dye for the other two skeins of the gradient. This will only help you if you're using the same kind of dye as me, but here are the water-to-dye ratios I used to overdye my skeins: 12g dye, 10 cups water; 15g dye, 10 cups water; 18g dye, 10 cups water. Basically, I used the same amount of water, but added 3g more of dye each time to get these results:
There are tons of ways to dye yarn; here are some resources to help get you started:
- Knitty: Handpainted Yarn
- Knitty: Dyeing with Plants
- Knitting Blooms: Dyeing Fiber
- Atomic Fiber: Dyeing Roving
- Handmade by Stefanie (hey, that's me!): Solar Dyeing with Kool-Aid
I'd love to hear about your favorite dye tutorials in the comments!
Like this post? Pin it!
Thanks for this useful info. I'd like to add that overdyeing is not just for fixing your mistakes. You can overdye commercial yarns as well. For years up to 95% of my yarn came from thrift shops, where color choice just doesn't exist - you get the color(s)that's in the bag. Overdyeing has saved the day for me more than once.
ReplyDelete
ReplyDeletePrime Trading Company offer a tailored solution to today's garment manufacturing.Our Production range Covers
V Neck Yarn Dyed Stripe and much more.