There's no worse feeling than looking down at your work and noticing a mistake several rows back, or - worse yet - a dropped stitch! When I was newer to knitting, this usually meant that I had to rip back several hours or ever days of work; sometimes, I would even restart the whole project from scratch. I wish I had known back then just how easy it is to fix this type of mistake without all of that frogging.
The simplest mistake to fix is a dropped stitch in stockinette. While knitting on my So Faded sweater recently, I noticed that I'd managed to drop a stitch and not notice it for several rounds. Here's what it looked like by the time I noticed the problem:
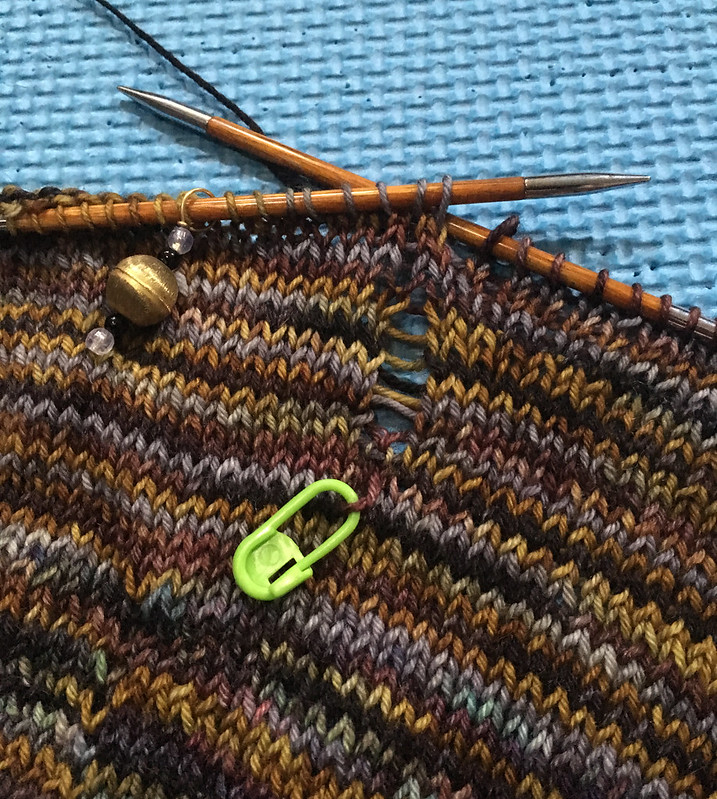
Notice that there is a removable stitch marker in the dropped stitch - this is to prevent it from dropping down any further until I could fix it, as I noticed this mistake while knitting on the go. It's always a good idea to have a few removable stitch markers in your purse or project bag for just such an occasion!
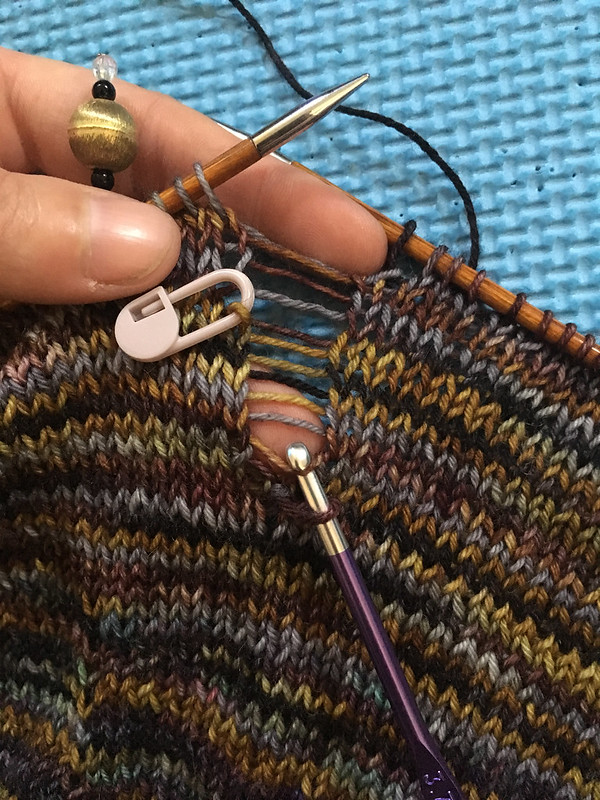
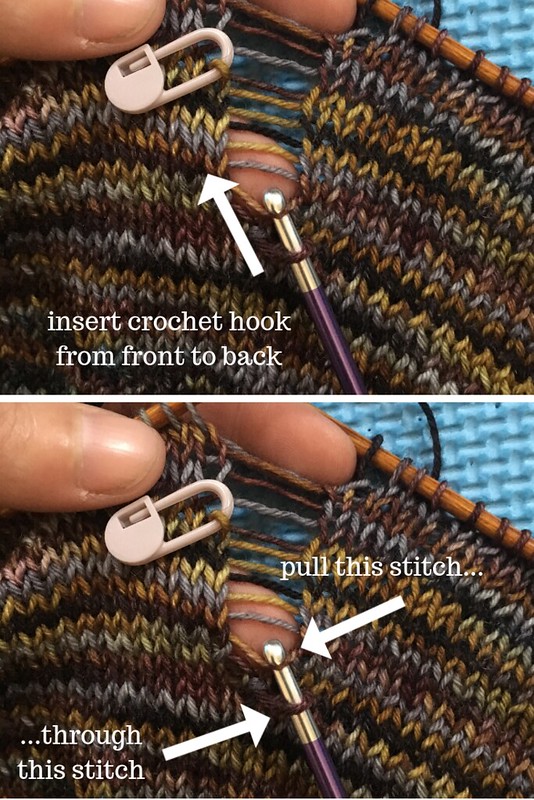
I prefer to use a crochet hook similar in size to my working needle to fix dropped stitches because all you have to do is put the hook through the live stitch from front to back, and then pull the next row of yarn through the live stitch with the hook from back to front. Repeat until you are back to where you started!
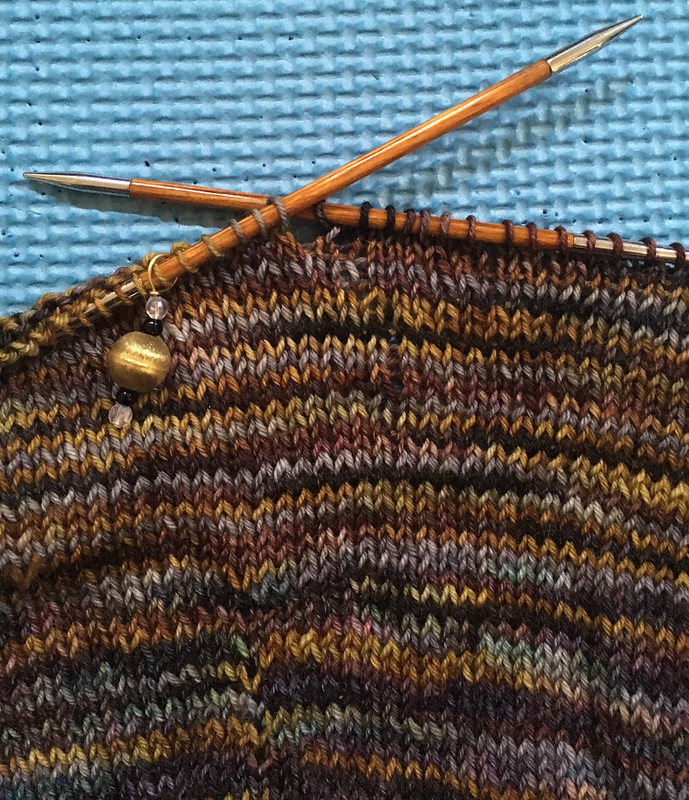
Of course, if you managed to knit several rounds without the dropped stitch, that means you will need to do some finagling to work the dropped stitch all the way back to where you're currently knitting. The good news is that any wonky stitches will probably block out just fine.
Not long ago, I Instagrammed a photo of a project I was performing surgery on to fix a dropped stitch in garter:
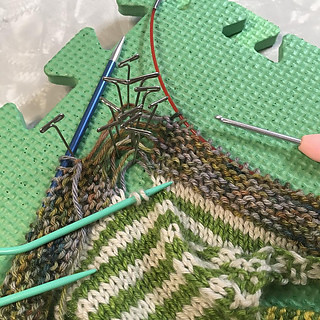
A lot of folks commented that they'd never thought to use T-pins to secure each row of yarn. To be perfectly honest, it had never occurred to me until this particular project, and it happened out of necessity: I kept picking up the wrong strand of yarn as I recreated the knits and purls for the garter pattern. It was really frustrating, and then I remembered this technique that a lot of lace knitters swear by. It's great for non-lace projects too because there's no need to rip back several inches of work! With just a bit of patience and a few handy tools, you can fix just about any mistake.
You'll need:
Method:
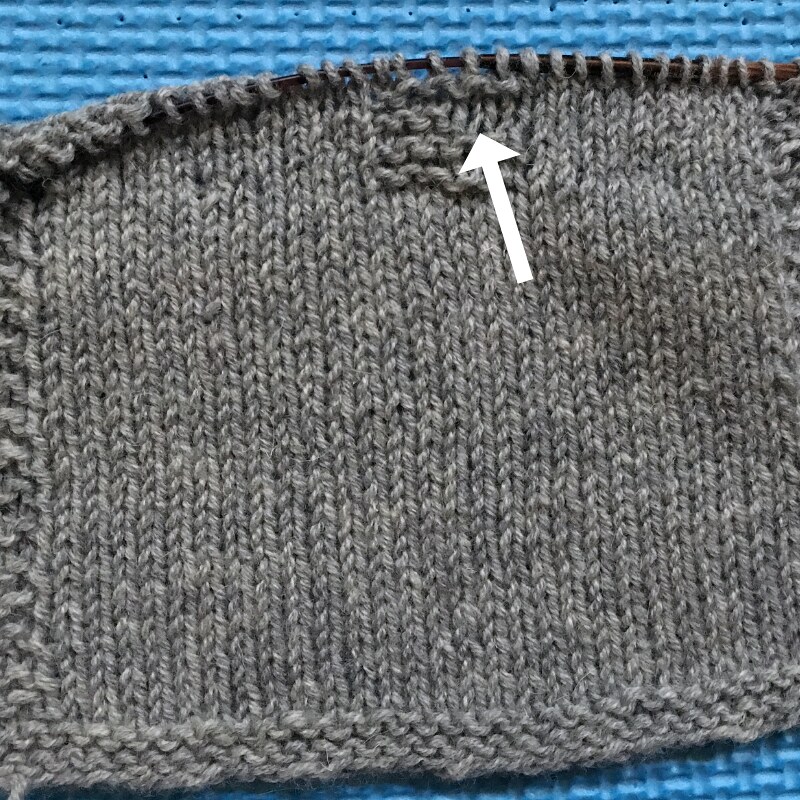
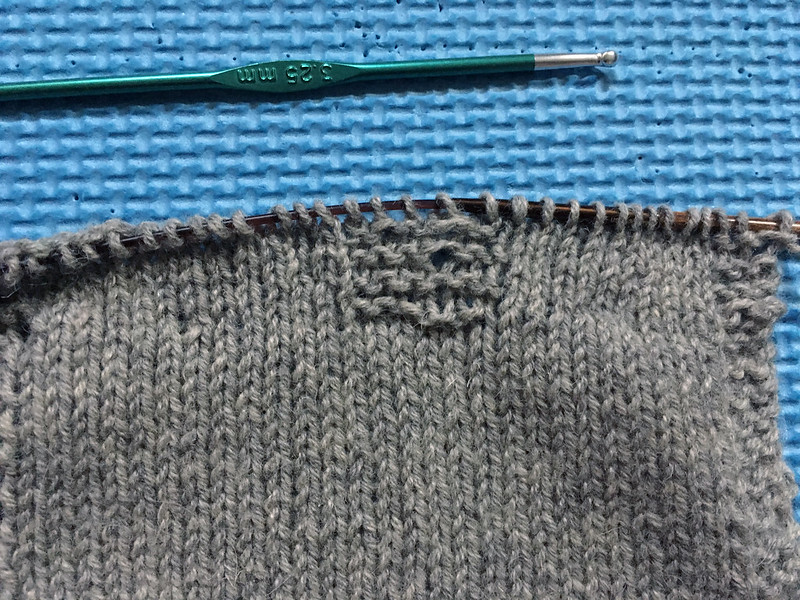
First, figure out which column of stitches needs to be fixed. It may be one, two, or more. In the swatch here, I need to add two purl stitches where the arrow is pointing:
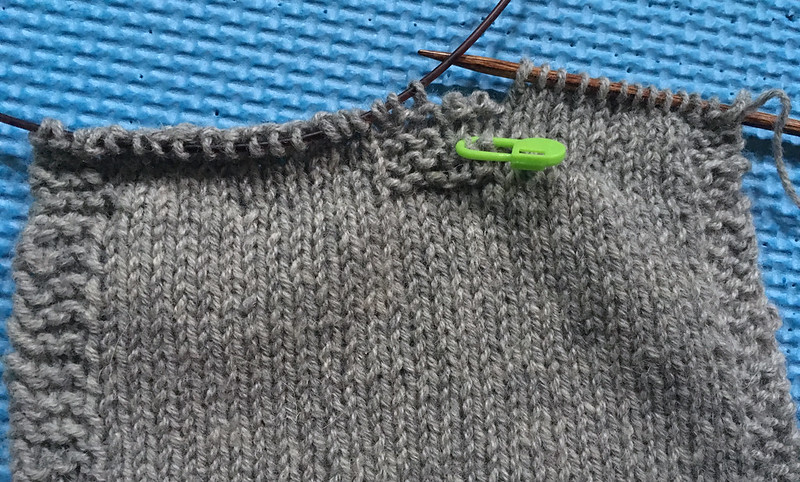
You'll want to work from the right side of the fabric, as it's easier to read your stitches. Mark the stitches 1 row below the one you need to fix with a removable stitch marker (this is to prevent dropping down too many rows).
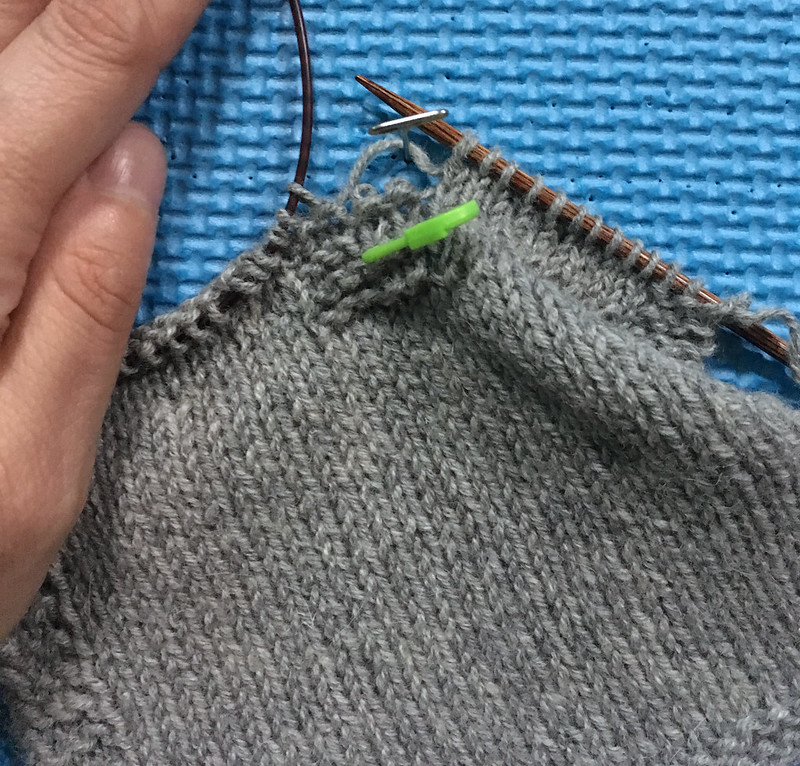
Now, slowly unravel each row one by one, taking the strands of yarn and pinning them as far away from your working stitches as possible; make sure to leave enough space for all of the rows you'll need to fix so that it is easier to rework them row-by-row for the next step.
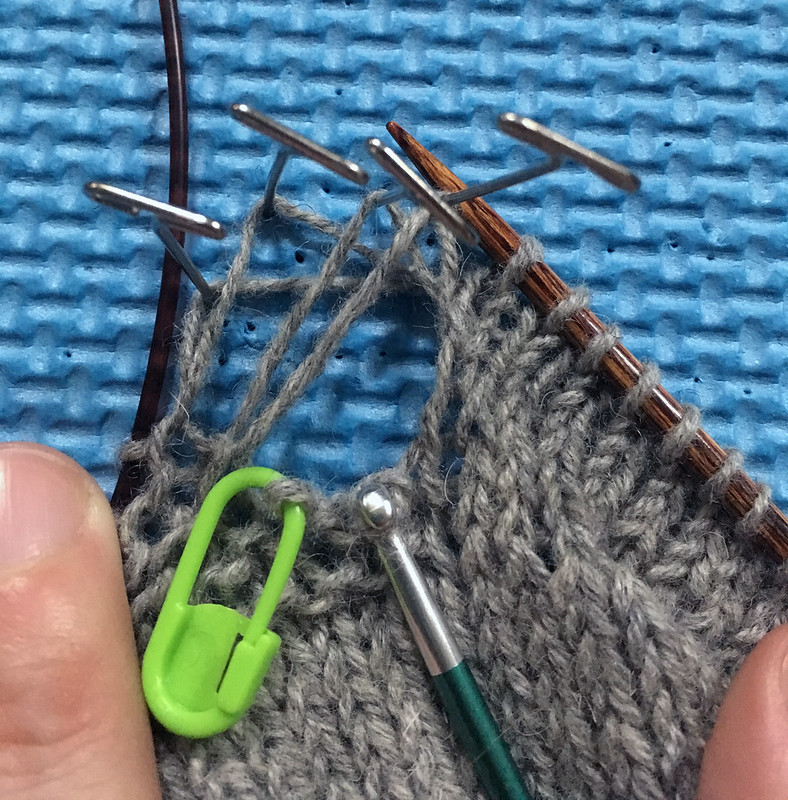 Once you reach the stitch that needs to be fixed, remove the stitch marker and put it on your crochet hook. Now it's time to work your way back up!
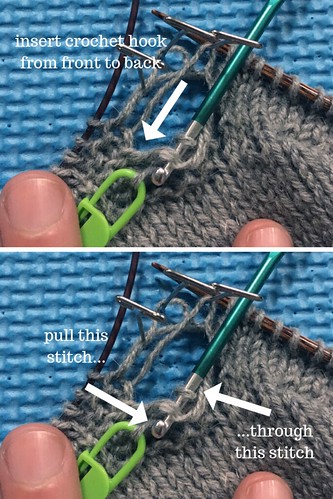
If you are trying to make a knit stitch, make sure that the strand of yarn for the next row is behind the live stitch. Insert your crochet hook from front to back and pull the strand of yarn for the next row through like so:
If you are trying to make a purl stitch, bring the strand of yarn for the next row in front of the live stitch. Insert your crochet hook from back to front and pull the strand of yarn for the next row through like so:
Keep going until you have worked all the way back up!
Some of the reworked stitches may look a little wonky, but a good wet blocking almost always fixes that.
I hope this tutorial helps you avoid unnecessary frogging in your projects - and if you found it helpful, please do share it with a friend!
Like this post? Pin it!
The simplest mistake to fix is a dropped stitch in stockinette. While knitting on my So Faded sweater recently, I noticed that I'd managed to drop a stitch and not notice it for several rounds. Here's what it looked like by the time I noticed the problem:
Notice that there is a removable stitch marker in the dropped stitch - this is to prevent it from dropping down any further until I could fix it, as I noticed this mistake while knitting on the go. It's always a good idea to have a few removable stitch markers in your purse or project bag for just such an occasion!
I prefer to use a crochet hook similar in size to my working needle to fix dropped stitches because all you have to do is put the hook through the live stitch from front to back, and then pull the next row of yarn through the live stitch with the hook from back to front. Repeat until you are back to where you started!
Of course, if you managed to knit several rounds without the dropped stitch, that means you will need to do some finagling to work the dropped stitch all the way back to where you're currently knitting. The good news is that any wonky stitches will probably block out just fine.
Not long ago, I Instagrammed a photo of a project I was performing surgery on to fix a dropped stitch in garter:
A lot of folks commented that they'd never thought to use T-pins to secure each row of yarn. To be perfectly honest, it had never occurred to me until this particular project, and it happened out of necessity: I kept picking up the wrong strand of yarn as I recreated the knits and purls for the garter pattern. It was really frustrating, and then I remembered this technique that a lot of lace knitters swear by. It's great for non-lace projects too because there's no need to rip back several inches of work! With just a bit of patience and a few handy tools, you can fix just about any mistake.
You'll need:
- crochet hook
- t-pins
- blocking mat
- extra needle or cable needle
Method:
First, figure out which column of stitches needs to be fixed. It may be one, two, or more. In the swatch here, I need to add two purl stitches where the arrow is pointing:
You'll want to work from the right side of the fabric, as it's easier to read your stitches. Mark the stitches 1 row below the one you need to fix with a removable stitch marker (this is to prevent dropping down too many rows).
Now, slowly unravel each row one by one, taking the strands of yarn and pinning them as far away from your working stitches as possible; make sure to leave enough space for all of the rows you'll need to fix so that it is easier to rework them row-by-row for the next step.
If you are trying to make a knit stitch, make sure that the strand of yarn for the next row is behind the live stitch. Insert your crochet hook from front to back and pull the strand of yarn for the next row through like so:
If you are trying to make a purl stitch, bring the strand of yarn for the next row in front of the live stitch. Insert your crochet hook from back to front and pull the strand of yarn for the next row through like so:
Keep going until you have worked all the way back up!
Some of the reworked stitches may look a little wonky, but a good wet blocking almost always fixes that.
I hope this tutorial helps you avoid unnecessary frogging in your projects - and if you found it helpful, please do share it with a friend!
Like this post? Pin it!
Comments
Post a Comment