When you think of Uruguay, inevitably you think of yarn....at least, if you are a knitter! Every yarn I've touched from Manos del Uruguay has not disappointed. I've been fortunate to work with several over the years, but somehow a skein of Serena, their blend of 60% baby alpaca and 40% pima cotton, never found its way into my hands. Until now! The kind folks at Fairmount Fibers, the US Distributor for Manos yarns, recently sent me a skein of Serena in a new colorway called Ethereal.
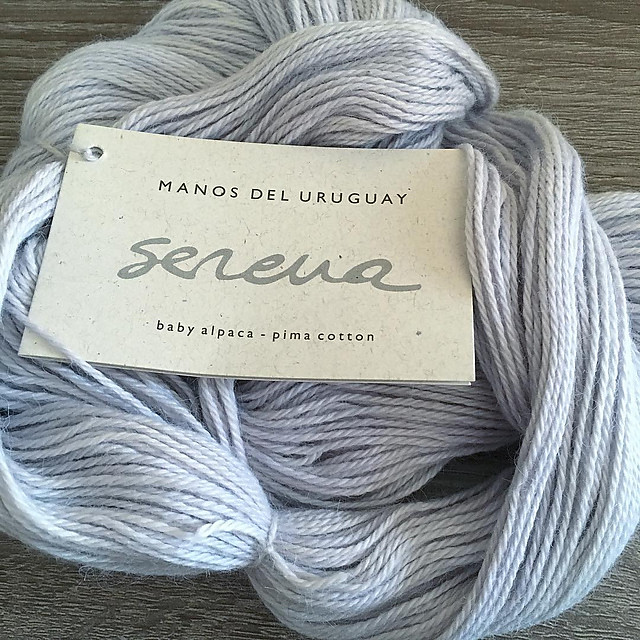
As soon as I felt how soft and squishy this skein was, I knew it wanted to be a lacy cowl of some sort. What I found interesting about this yarn is that it's labeled as a sport weight, but the site notes that it has a "versatile" gauge. I ended up using smaller needles than recommended to knit this project, but I have a little bit left over and may have to try knitting a swatch on US 6 or 7 out of sheer curiosity!
This yarn was amazing to work with, and in fact, I forgot that it had cotton in! Like a lot of knitters, I find that cotton and cotton yarn blends are sometimes stiff and cause pain in my hands, but this yarn was soft and supple, gliding effortlessly over my needles. It also stood up to a good frogging - I was about halfway through the first version of this pattern when I decided to rip everything out and restart so I could add in a few more pattern repeats (this is apparently an important part of my design process).
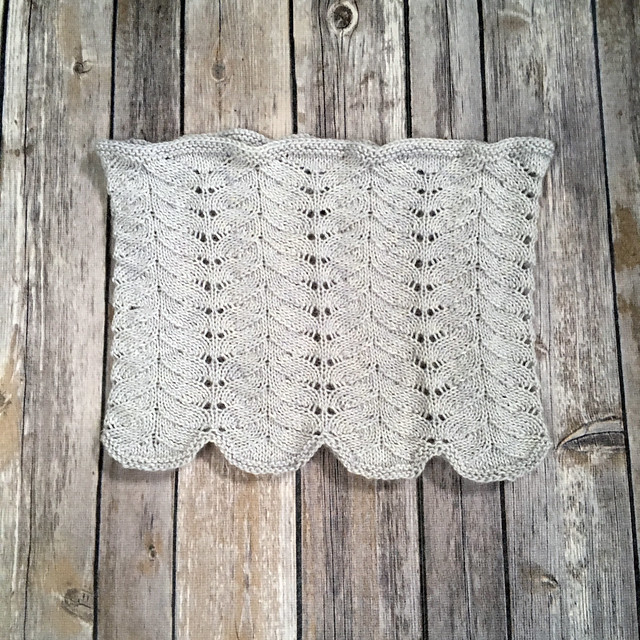
I was pleased with this yarn's stitch definition after a light steam block: there was just enough bloom and all the "lumpy bumpy" stitches relaxed beautifully! I do plan to do a full wet block at some point, which is what the care instructions recommend.
As I was knitting this cowl, the pretty heathered color paired with the elegant stitch pattern made me think of the beautiful art in the Monstress comic series, so I decided to call this pattern the Lilium Cowl (lilium is a fictitious magical substance...I won't bore you with any more detail than that!).
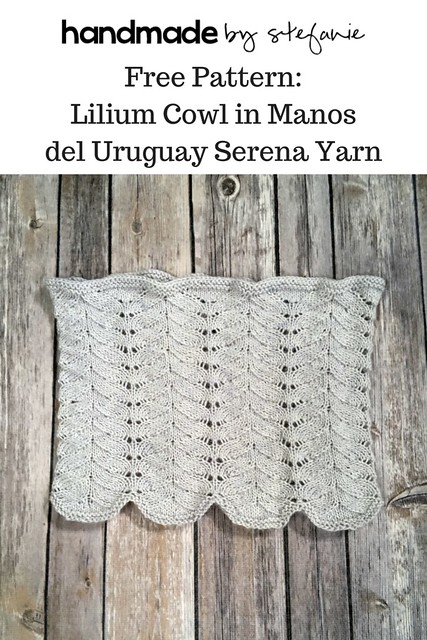
The free pattern (which includes full written instructions) can be found below, and if you want a printable PDF that also includes a chart (yay charts!), you can purchase for only $2 here on Ravelry.
Lilium Cowl
by Stefanie Goodwin-Ritter
Skill Level
Intermediate
Sizing
One Size Fits Most: Approx. 22” Circumference
11” width x 9” height when measured flat
Materials
1 skein Manos Del Uruguay Serena yarn in Ethereal (60% baby alpaca / 40% pima cotton, 170 yards (50 grams) US #3 16” Circular Needles
Stitch markers
Darning Needle
Gauge 25 stitches and 42 rounds = 4” in Lilium Lace stitch pattern
Abbreviations can be found here.

To Make Cowl:
Cast on 168 stitches; I used the german twist method to produce a stretchy edging.
Join to work in round and place unique marker for beginning of round, being careful not to twist stitches.
Garter stitch border: Round 1: K all stitches.
Round 2: Purl all stitches.
Repeat Rounds 1 & 2 one more time.
Work 12 repeats of Lilium Lace as follows (charted pattern available for purchase here):
Round 1: *K5, k2tog, k3, yo, k1, yo, k3, ssk, k5, repeat from * to end of round.
Round 2: *K4, k2tog, k3, yo, k3, yo, k3, ssk, k4, repeat from * to end of round.
Round 3: *K3, k2tog, k3, yo, k5, yo, k3, ssk, k3, repeat from * to end of round.
Round 4: *K2, k2tog, k3, yo, k7, yo, k3, ssk, k2, repeat from * to end of round.
Round 5: *K1, k2tog, k3, yo, k9, yo, k3, ssk, k1, repeat from * to end of round.
Round 6: *K2tog, k3, yo, k11, yo, k3, ssk, repeat from * to end of round.
Tip: Placing a stitch marker in between each 21-stitch repeat will keep you from getting “lost” as you knit across the round. Find more of my tried-and-true chart reading hacks here on this blog post.
When you have worked all 12 repeats of the Lilium Lace stitch pattern (72 rounds total), work 4 rounds of Garter Stitch Border as you did at start.
BO all stitches loosely knitwise. We block in your preferred wool wash and lay flat to dry.
As soon as I felt how soft and squishy this skein was, I knew it wanted to be a lacy cowl of some sort. What I found interesting about this yarn is that it's labeled as a sport weight, but the site notes that it has a "versatile" gauge. I ended up using smaller needles than recommended to knit this project, but I have a little bit left over and may have to try knitting a swatch on US 6 or 7 out of sheer curiosity!
This yarn was amazing to work with, and in fact, I forgot that it had cotton in! Like a lot of knitters, I find that cotton and cotton yarn blends are sometimes stiff and cause pain in my hands, but this yarn was soft and supple, gliding effortlessly over my needles. It also stood up to a good frogging - I was about halfway through the first version of this pattern when I decided to rip everything out and restart so I could add in a few more pattern repeats (this is apparently an important part of my design process).
I was pleased with this yarn's stitch definition after a light steam block: there was just enough bloom and all the "lumpy bumpy" stitches relaxed beautifully! I do plan to do a full wet block at some point, which is what the care instructions recommend.
As I was knitting this cowl, the pretty heathered color paired with the elegant stitch pattern made me think of the beautiful art in the Monstress comic series, so I decided to call this pattern the Lilium Cowl (lilium is a fictitious magical substance...I won't bore you with any more detail than that!).
The free pattern (which includes full written instructions) can be found below, and if you want a printable PDF that also includes a chart (yay charts!), you can purchase for only $2 here on Ravelry.
Lilium Cowl
by Stefanie Goodwin-Ritter
Skill Level
Intermediate
Sizing
One Size Fits Most: Approx. 22” Circumference
11” width x 9” height when measured flat
Materials
1 skein Manos Del Uruguay Serena yarn in Ethereal (60% baby alpaca / 40% pima cotton, 170 yards (50 grams) US #3 16” Circular Needles
Stitch markers
Darning Needle
Gauge 25 stitches and 42 rounds = 4” in Lilium Lace stitch pattern
Abbreviations can be found here.
To Make Cowl:
Cast on 168 stitches; I used the german twist method to produce a stretchy edging.
Join to work in round and place unique marker for beginning of round, being careful not to twist stitches.
Garter stitch border: Round 1: K all stitches.
Round 2: Purl all stitches.
Repeat Rounds 1 & 2 one more time.
Work 12 repeats of Lilium Lace as follows (charted pattern available for purchase here):
Round 1: *K5, k2tog, k3, yo, k1, yo, k3, ssk, k5, repeat from * to end of round.
Round 2: *K4, k2tog, k3, yo, k3, yo, k3, ssk, k4, repeat from * to end of round.
Round 3: *K3, k2tog, k3, yo, k5, yo, k3, ssk, k3, repeat from * to end of round.
Round 4: *K2, k2tog, k3, yo, k7, yo, k3, ssk, k2, repeat from * to end of round.
Round 5: *K1, k2tog, k3, yo, k9, yo, k3, ssk, k1, repeat from * to end of round.
Round 6: *K2tog, k3, yo, k11, yo, k3, ssk, repeat from * to end of round.
Tip: Placing a stitch marker in between each 21-stitch repeat will keep you from getting “lost” as you knit across the round. Find more of my tried-and-true chart reading hacks here on this blog post.
When you have worked all 12 repeats of the Lilium Lace stitch pattern (72 rounds total), work 4 rounds of Garter Stitch Border as you did at start.
BO all stitches loosely knitwise. We block in your preferred wool wash and lay flat to dry.
Like this post? Pin it!
Comments
Post a Comment