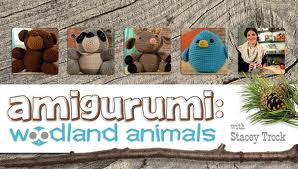
Craftsy Class Review
A while back, I signed up for Stacey Trock's Amigurumi: Woodland Animals class on Craftsy. After having so much fun crocheting Jack the Tiny Pumpkin last month, I decided it was finally time to get started on this class!This past Saturday, I watched lessons 1-4; since each subsequent lesson focuses on a specific project to built crochet and amigurumi skills, I'll be posting mini-reviews of each one as I complete them.
After watching the intro, I was totally psyched to get going on my amigurumi adventure. Stacey is so enthusiastic and really makes you feel like you can accomplish anything. Each project is designed to help build the skills needed to create whatever amigurumi your heart desires. I'm so excited to fine-tune my crochet skills and learn nifty tips and tricks along the way.
 While it probably would help to have a solid basic crochet foundation to work from (see: Crochet Lab with Vicki Howell), Stacey does give you a primer in lesson 2 if this is your first time wielding a hook. Once she covers the basics - chaining, single crochet, increasing and decreasing - she goes over the skills required to create the first and most basic project, the blue bird. The real gold is the amigurumi-specific techniques, especially when it comes to getting started. Stacey shows you both the 'sloppy slip knot' and the magic ring methods to get started without leaving a big ol' hole in your work; with the few amigurumis I've attempted up until this point, I just accepted that hole as a given and used my yarn tail to close it up....but trust me, it doesn't look as nice as using these techniques!
Also covered in the second lesson is the difference between crocheting through both loops of the chain (as 'normal' crocheting is done) and crocheting through the back loop of the chain (which is typically done in amigurumi to create a more substantial fabric). As if that weren't enough, she demonstrates a simple way to change colors cleanly, something I'd come across in my remedial crochet adventures but hadn't taken the time to master.
 |
| Birdie in progress! |
By the time I'd finished the beak and wings, I'd totally mastered the sloppy slip knot, figuring out where the beginning of each round was, and increasing and decreasing like a champ. Both of my wings matched each other, too - no accidental increases or decreases. Score!
 |
| All done! |
Finally, the finishing tips for attaching various pieces were also of help. I'm no stranger to making stuffed critters, but I always like to hear how other people approach assembling them because I often pick up a helpful tip along the way!
I started my birdie on Saturday afternoon and finished the weekend with an adorable feathery friend. Click here to sign up for Woodland Animals and start your own amigurumi adventure!


Thank you so much for these tips! I'm getting ready to sign up for Stacy's class and I'm nervous but you just got rid of my jitters. Thanks so much!!! And your little birdie is so cute!
ReplyDeleteCindy