Drum carding looks so easy: you just toss in some fiber, and out pops a perfect batt, right?
Like anything that's made by hand, it's simple....but not that simple. For me, a lot of my learning curve was due to my tendency to overthink things and try to fix things that didn't need fixing. Once I got over that, I found that any other little hiccups were solved simply by doing. Practice does make perfect, and here are some of the most important lessons I've learned along the way - may they shorten your own learning curve when you give drum carding a try!
1. Prep before you prep.
Sounds a bit silly, right? But the denser your fleece or fiber is, the harder it will be to process in your drum carder (not to mention, harder on your drum carder). Pretty much everything I've come across cautions against feeding too much fiber into the carder; the instructions that came with my carder (a Strauch Petite) recommend teasing fleece and fiber before processing and feeding a little at a time. In The Spinner's Book of Yarn Designs, Sarah Anderson suggests that the fiber on your tray should be thin enough to read a paper through - a good reference point for us visual folks.
While I haven't attempted to process a raw fleece (yet), that also has an important bit of prep involved before reaching the carding phase. Apparently, any lanolin or grease on your fleece can wreak havoc on your drum carder in a number of ways. First, if the fleece is very clumpy due to lanolin, it may damage your carder if you try to force it through. Not to mention, that lanolin will also coat the card cloth and can transfer to other fibers that you card later on. So, make sure that any fibers you plan to card are squeaky clean.
Last but not least, the carding process isn't meant to remove those bits of the outside world that you sometimes find in a fleece (known as vegetable matter, or VM for short). Sometimes, VM will fall out on its own as you card, but you should consider that a bonus.
The bottom line: Make sure your fiber is washed (if needed), and flick or tease it to open the fibers and remove VM.
2. Slow is the way to go.
As a beginner, you will have the overwhelming urge to crank the handle on your drum carder and let the fiber fly!
Resist that urge.
Believe me, I know how hard it is - learning to slow down has never been easy for me, either. But the slower you go, the better your end results. I promise!
On one particularly stressful day after I'd finished doing my taxes (groan), I decided to break out the drum carder, and made an awesome discovery: the more I slowed down, the easier it was to fill my drum and create beautiful batts. As an added bonus, I felt way less stressed afterwards, so if anyone is suffering from anxiety or stress, I highly recommend an afternoon of slow drum carding.
3. Don't be afraid to experiment.
I'm not sure if anyone else has this paranoia, but I'm always worried that I'm "doing it wrong." In knitting, in spinning, in life....I fully expect someone to pop out from behind the curtain in my living room to announce that whatever I'm doing is incorrect.
However, impostor syndrome can be a huge barrier to making some pretty cool discoveries, so sometimes it's good to ignore that irrational little voice. Somewhat ironically, in my zeal to discover the "right" way to drum card, I came across a suggestion that sounded absolutely wrong - feeding the fiber in sideways - but ended up giving it a try.....but not after first thinking "that's ludicrous - every single book I own tells me to feed the fiber in lengthwise, and so does the operating manual for my drum carder!"
Thankfully, curiosity got the better of me, and one afternoon I used a variety of dyed tops that I flicked on a hand carder before feeding into my drum carder sideways, and the resulting batts were lovely! I'm not sure if it was because I was using a shorter stapled fiber (merino), but it seemed to pick up and transfer the fibers a little easier with this method.
There are compelling reasons to use both methods of feeding fibers into my drum carder, and I plan to use both going forward. Should anyone interrupt to tell that I'm doing it wrong, I'll be sure to have a few choice words for them!
Got any helpful fiber prep tips to share? I'd love to read them in the comments. And if you liked this post, be sure to pin the graphic below to save it for later!
Like anything that's made by hand, it's simple....but not that simple. For me, a lot of my learning curve was due to my tendency to overthink things and try to fix things that didn't need fixing. Once I got over that, I found that any other little hiccups were solved simply by doing. Practice does make perfect, and here are some of the most important lessons I've learned along the way - may they shorten your own learning curve when you give drum carding a try!
1. Prep before you prep.
Sounds a bit silly, right? But the denser your fleece or fiber is, the harder it will be to process in your drum carder (not to mention, harder on your drum carder). Pretty much everything I've come across cautions against feeding too much fiber into the carder; the instructions that came with my carder (a Strauch Petite) recommend teasing fleece and fiber before processing and feeding a little at a time. In The Spinner's Book of Yarn Designs, Sarah Anderson suggests that the fiber on your tray should be thin enough to read a paper through - a good reference point for us visual folks.
While I haven't attempted to process a raw fleece (yet), that also has an important bit of prep involved before reaching the carding phase. Apparently, any lanolin or grease on your fleece can wreak havoc on your drum carder in a number of ways. First, if the fleece is very clumpy due to lanolin, it may damage your carder if you try to force it through. Not to mention, that lanolin will also coat the card cloth and can transfer to other fibers that you card later on. So, make sure that any fibers you plan to card are squeaky clean.
Last but not least, the carding process isn't meant to remove those bits of the outside world that you sometimes find in a fleece (known as vegetable matter, or VM for short). Sometimes, VM will fall out on its own as you card, but you should consider that a bonus.
The bottom line: Make sure your fiber is washed (if needed), and flick or tease it to open the fibers and remove VM.
 |
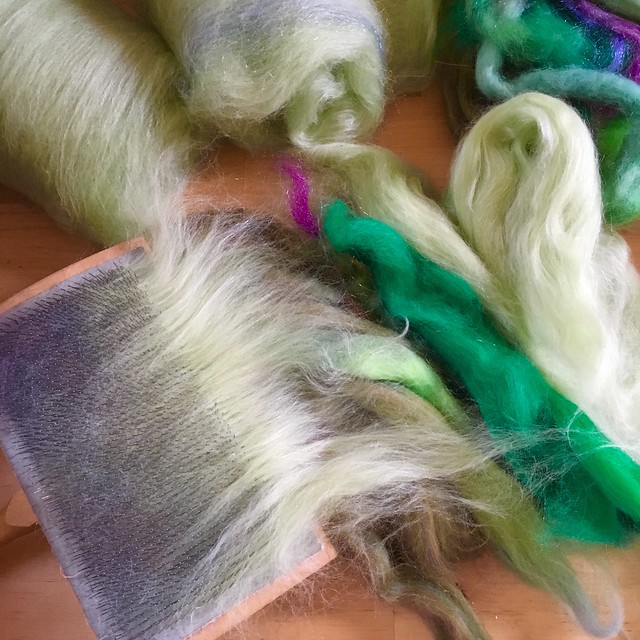
| I've been flicking on a hand carder to open compressed fibers before feeding into my drum carder. |
As a beginner, you will have the overwhelming urge to crank the handle on your drum carder and let the fiber fly!
Resist that urge.
Believe me, I know how hard it is - learning to slow down has never been easy for me, either. But the slower you go, the better your end results. I promise!
On one particularly stressful day after I'd finished doing my taxes (groan), I decided to break out the drum carder, and made an awesome discovery: the more I slowed down, the easier it was to fill my drum and create beautiful batts. As an added bonus, I felt way less stressed afterwards, so if anyone is suffering from anxiety or stress, I highly recommend an afternoon of slow drum carding.
 |
| Channel your inner sloth when processing fiber. |
3. Don't be afraid to experiment.
I'm not sure if anyone else has this paranoia, but I'm always worried that I'm "doing it wrong." In knitting, in spinning, in life....I fully expect someone to pop out from behind the curtain in my living room to announce that whatever I'm doing is incorrect.
However, impostor syndrome can be a huge barrier to making some pretty cool discoveries, so sometimes it's good to ignore that irrational little voice. Somewhat ironically, in my zeal to discover the "right" way to drum card, I came across a suggestion that sounded absolutely wrong - feeding the fiber in sideways - but ended up giving it a try.....but not after first thinking "that's ludicrous - every single book I own tells me to feed the fiber in lengthwise, and so does the operating manual for my drum carder!"
 |
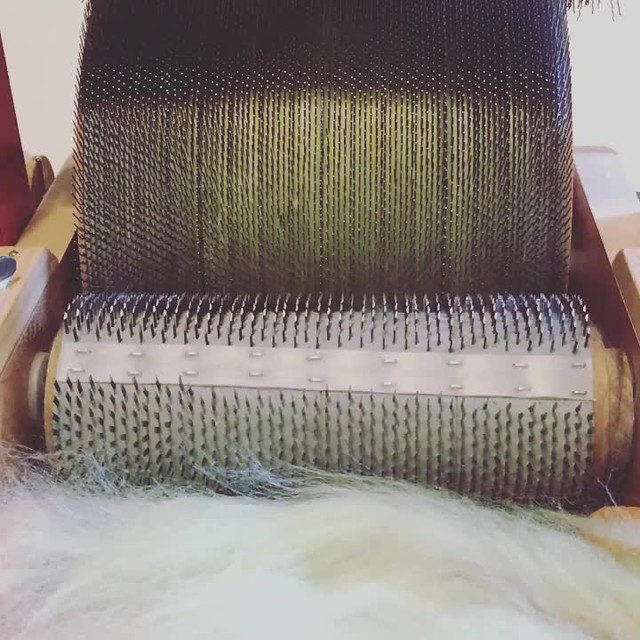
| Slowly feeding that fiber in sideways... |
Thankfully, curiosity got the better of me, and one afternoon I used a variety of dyed tops that I flicked on a hand carder before feeding into my drum carder sideways, and the resulting batts were lovely! I'm not sure if it was because I was using a shorter stapled fiber (merino), but it seemed to pick up and transfer the fibers a little easier with this method.
There are compelling reasons to use both methods of feeding fibers into my drum carder, and I plan to use both going forward. Should anyone interrupt to tell that I'm doing it wrong, I'll be sure to have a few choice words for them!
Got any helpful fiber prep tips to share? I'd love to read them in the comments. And if you liked this post, be sure to pin the graphic below to save it for later!


I'm going to have to try the sideways feeding ... sounds really interesting!
ReplyDelete