A few years ago, I spotted some cute needle felted ornaments on Pinterest that were made using cookie cutters to create the shapes. How clever is that?! Ever since, I have been thinking about giving it a try myself, and finally decided to take a stab at it for my Christmas in July theme. Pun very much intended - please feel free to roll your eyes accordingly!
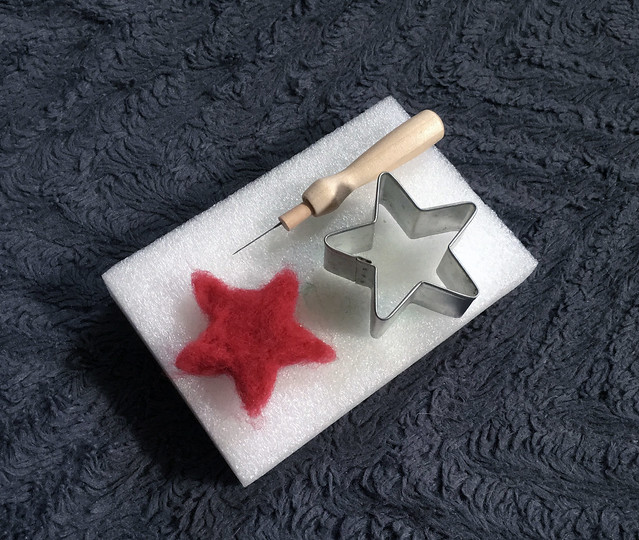
It had been so long since I last attempted a needle felting project that I couldn't find any of my supplies, so I ended up buying this affordable little kit on Amazon that has everything I need and then some! Then I dug out my cookie cutter collection (make sure they are the kind that are open on the top and bottom) and grabbed some wool roving from Kraemer Yarns for an afternoon of stabby fun.

First, if you are new to needle felting, here are the basics: you are using a special kind of needle that has bumps on it to repeatedly stab the wool fiber, causing the scales on the wool fibers to begin fusing together. So, it's important that you are not using any wool fiber labeled superwash, as those scales will have been removed to prevent felting! You can use other types of fiber so long as they have felting properties, but typically wool fibers are used for needle felting projects. The needles are super duper sharp, so make sure that you are careful and you may even want to verify that you're up-to-date on your Tetanus shots. The kit I purchased includes some finger protectors that are a little awkward to use, but definitely worth trying out.
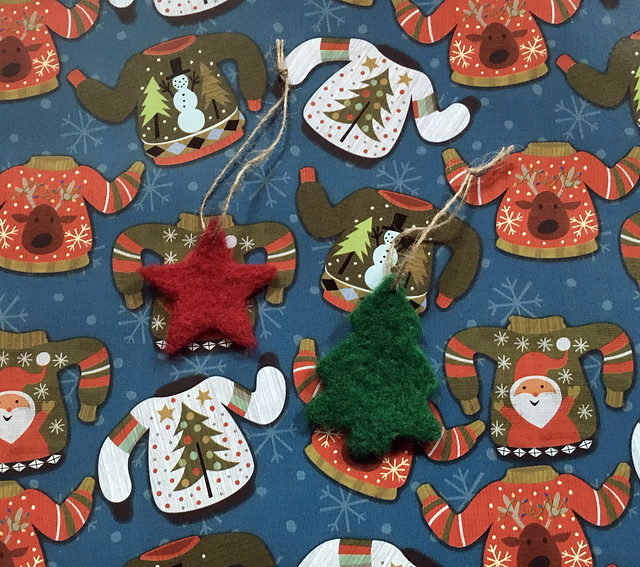
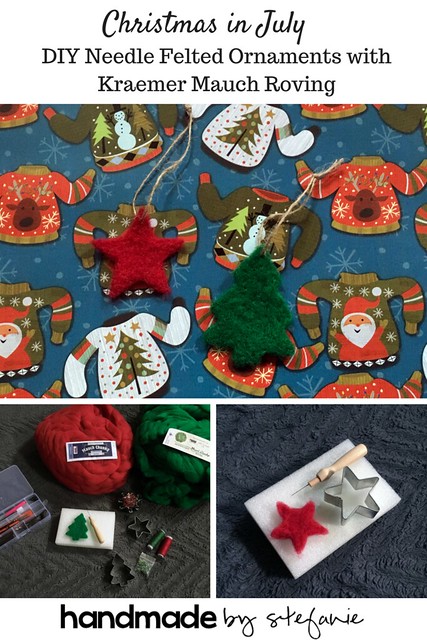
I chose Mauch Chunky Roving for this project because I'd heard that this fiber was great for felting projects. Another plus is that it's made from 100% US-grown wool that is processed at their mill in Nazareth, PA and comes in a huge palette of colors - 56 in all! Here are the ornaments I made one rainy Saturday afternoon; the star is made with Strawberry Mauch Roving and the tree is made with Vibrant Green Mauch roving, both from Kraemer Yarns:
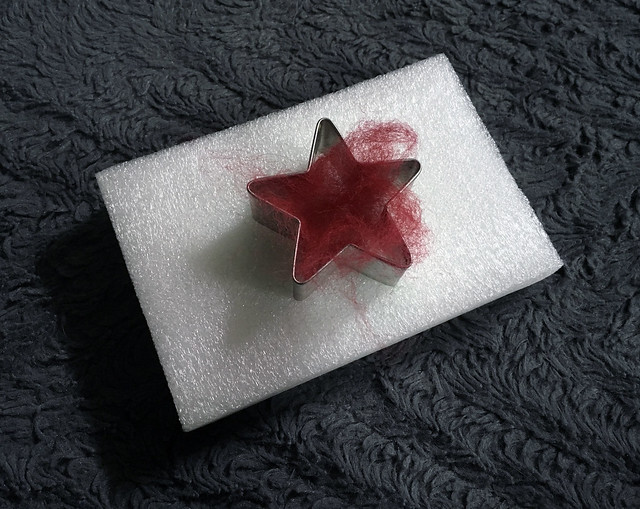
To make the ornaments, I started by placing a small amount of fiber inside of a cookie cutter placed on top of the felting surface. Chaos is encouraged here, by which I mean you should lay the fibers down in various directions to aid the felting process. If the fibers are placed in an orderly fashion going in the same direction, you'll spend way more time and energy felting them.
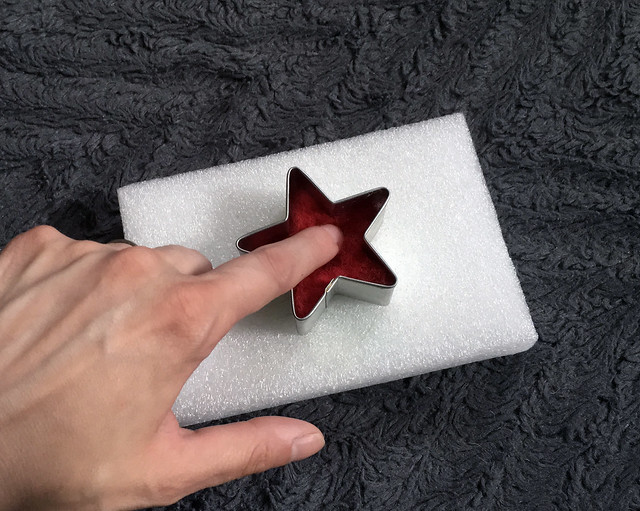
Now for the fun part: start stabbing! I like to start with the outline of the shape and work my way inwards, but there really is no WRONG way to stab fiber repeatedly. Needle felting is fun, easy and therapeutic that way!
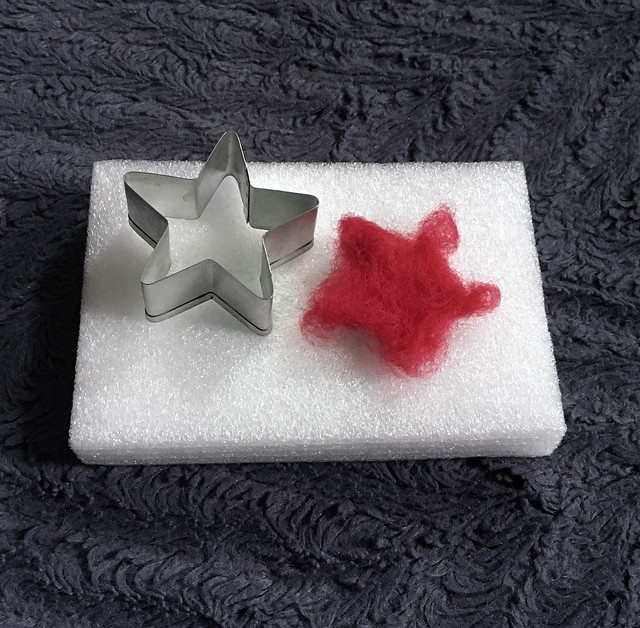
Make sure that you frequently flip the fiber you are felting over so that it doesn't get stuck to the felting surface. The nice thing about using this type of cookie cutter is that you just have to flip the whole kit & caboodle over, then push the fiber down to lay flush with the surface before you start stabbing once more. You can also add more bits of fiber as you see fit to make sure that the felted piece is nice and even.
Then keep stabbing....and stabbing....and stabbing some more.
At some point, you might think you are close to done, and you will remove the felt shape to most likely discover that YOU ARE NOT!
Place it back in the cookie cutter and start stabbing some more. You'll get there soon!
You'll know you're done when it becomes difficult to pierce the felt with your needle. Once that happens, remove it and use a darning needle to run some scrap yarn or thin twine through the top as a hanger. You may wish to trim any "fuzzy" edges to give a more crisp appearance, and you can even embellish the piece with beads, sequins or smaller bits of wool if you're feeling fancy.
Like this post? Pin it!
You may like to know: I was provided free product in exchange for this blog post. All opinions & ideas are my own!
It had been so long since I last attempted a needle felting project that I couldn't find any of my supplies, so I ended up buying this affordable little kit on Amazon that has everything I need and then some! Then I dug out my cookie cutter collection (make sure they are the kind that are open on the top and bottom) and grabbed some wool roving from Kraemer Yarns for an afternoon of stabby fun.
First, if you are new to needle felting, here are the basics: you are using a special kind of needle that has bumps on it to repeatedly stab the wool fiber, causing the scales on the wool fibers to begin fusing together. So, it's important that you are not using any wool fiber labeled superwash, as those scales will have been removed to prevent felting! You can use other types of fiber so long as they have felting properties, but typically wool fibers are used for needle felting projects. The needles are super duper sharp, so make sure that you are careful and you may even want to verify that you're up-to-date on your Tetanus shots. The kit I purchased includes some finger protectors that are a little awkward to use, but definitely worth trying out.
I chose Mauch Chunky Roving for this project because I'd heard that this fiber was great for felting projects. Another plus is that it's made from 100% US-grown wool that is processed at their mill in Nazareth, PA and comes in a huge palette of colors - 56 in all! Here are the ornaments I made one rainy Saturday afternoon; the star is made with Strawberry Mauch Roving and the tree is made with Vibrant Green Mauch roving, both from Kraemer Yarns:
To make the ornaments, I started by placing a small amount of fiber inside of a cookie cutter placed on top of the felting surface. Chaos is encouraged here, by which I mean you should lay the fibers down in various directions to aid the felting process. If the fibers are placed in an orderly fashion going in the same direction, you'll spend way more time and energy felting them.
Now for the fun part: start stabbing! I like to start with the outline of the shape and work my way inwards, but there really is no WRONG way to stab fiber repeatedly. Needle felting is fun, easy and therapeutic that way!
Make sure that you frequently flip the fiber you are felting over so that it doesn't get stuck to the felting surface. The nice thing about using this type of cookie cutter is that you just have to flip the whole kit & caboodle over, then push the fiber down to lay flush with the surface before you start stabbing once more. You can also add more bits of fiber as you see fit to make sure that the felted piece is nice and even.
Then keep stabbing....and stabbing....and stabbing some more.
At some point, you might think you are close to done, and you will remove the felt shape to most likely discover that YOU ARE NOT!
Place it back in the cookie cutter and start stabbing some more. You'll get there soon!
You'll know you're done when it becomes difficult to pierce the felt with your needle. Once that happens, remove it and use a darning needle to run some scrap yarn or thin twine through the top as a hanger. You may wish to trim any "fuzzy" edges to give a more crisp appearance, and you can even embellish the piece with beads, sequins or smaller bits of wool if you're feeling fancy.
Like this post? Pin it!
You may like to know: I was provided free product in exchange for this blog post. All opinions & ideas are my own!
Comments
Post a Comment