Remember when I said this wasn't turning into a quilting blog? Turns out that was only partially true. Although I am still knitting on the regular, I have also been exploring more quilting stuff. Over the summer, I finished the Quarantine Hexie Quilt made from all the fabric leftover from making face masks:
I was also inspire to put together my first real quilt top! A coworker recommended doing a "Jelly Roll Race Quilt" (for non-quilters, a jelly roll is a common term for precut strips of fabric that are 2.5 inches wide). There are several versions of the Jelly Roll Race quilt, each with a video tutorial, but each one is quick and easy to make because you don't have to do a lot of fussy fabric cutting and piecing. All you have to do is sew all of your fabric strips together into one long continuous strip, and then keep folding it in half to sew one edge of the strips together until you make the size of quilt you want.
It's so easy, even a total beginner quilter like me could do it! I opted for the Jelly Roll Race 2 quilt pattern, which added small squares between the strips for added visual interest. I had some 5" squares in my fabric stash that I could cut into 4 smaller squares, so I didn't even have to buy extra fabric!
From there, you add some borders from fabric yardage (I made mine a little bit wider than the pattern specified), and then you have a finished quilt top!
Of course, there are still some steps before you have a usable quilt. Once you have a quilt top, you have to use it to create a "quilt sandwich," which consists of your quilt top on the top, a sheet of batting in the middle, and some backing fabric. From there, the quilt sandwich must be stitched or tacked together in some way before an edging (called binding) is applied.
There are so many ways to do this, I'm not sure I could cover ever single one here, but I'll try! Some patient folks (like my friend Allyson) quilt by hand, stitching designs they have drawn on with stencils and non-permanent ink or chalk, or using the hand tying method. Others use their home machines - it looks challenging to finish a larger project on a regular sewing machine (or embroidery machine), but it absolutely is possible, I'm told. Last but not least, there are folks with the space who have invested in a long arm machine for home use. If you aren't one of these lucky people and don't want to finish by hand, you can probably find someone in your area who can be hired to longarm quilt for you.
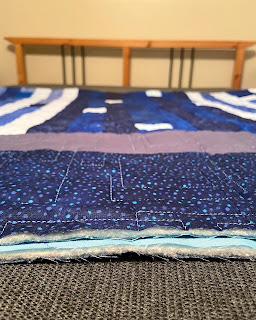
That's actually a service we provide at my new job (MSQC) and I was excited to try it out (machine quilting @ MSQC link here). I sent in my quilt in mid-September, and it was returned to me by the end of October, ready for binding (that's where you add an edging to the quilt to secure the raw edges of the quilted sandwich, which you can see in the photo above).
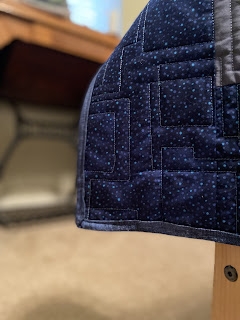
What's cool is you can choose from a number of patterns that they will stitch edge-to-edge on your quilt sandwich. I chose the "square meander" pattern and it turned out like this:
 |
| Front |
 |
| Back |
Important note: Generally, you can add on binding by machine (or even by hand!) as an extra service when you are having your machine quilting take place. I probably will opt for that next time because doing my own binding at home was quite the undertaking!
 |
| Binding fabric ready to attach! |
 |
| Quilt binding in progress! |
I'm glad I have a better understanding of the process, even if it's that I'd like to avoid it in the future for projects of a similar size....it's definitely not perfect, but it will do the trick.
I think it looks pretty great on our bed!


Comments
Post a Comment