At the start of 2017, I purchased a rigid heddle loom, determined to learn how to weave. Like any craft, the basics are fairly easy, but there is always much to learn and improve no matter your skill level, especially if you want to move beyond the basics. After a year of mostly-consistent weaving, I would label myself as a novice at best, and as I started looking at all of my weaving projects from 2017, I realized that each one taught me something valuable that I can take into Year Two of weaving. I hope other beginning weavers find this helpful, too - maybe it can shorten the learning curve for you just a bit!
Project #2: Destash Scarf
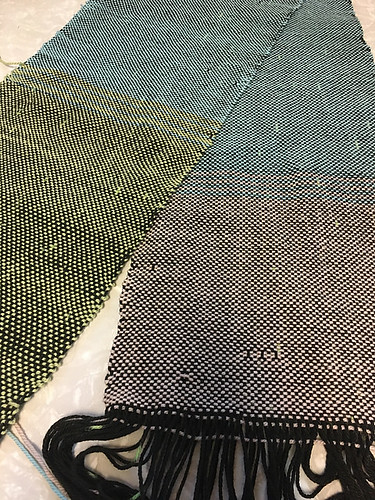
I may have gone overboard with planning this project to make up for not planning the other one - I very painstakingly went through my bits and bobs of leftover worsted weight yarn to select the perfect gradients of blue and green with some black and grey for good measure. Unfortunately, I didn't take fiber content into consideration when planning my warp yarn, which resulted in some crazy tension issues (some of my warp yarns were extremely springy while others were quite the opposite). So, the next time I do a multicolored warp, you can bet it will be with yarns that are either the same brand or at least have similar fiber content. I also got overzealous with winding a succession of yarn colors onto my stick shuttle, which wasn't always an issue, but there were a few times I didn't like how the current selection wove up, which meant that I had to wind off the unused yarn and find something to sub in on the fly. I also made this scarf a tad narrower than I would have liked, but on the plus side, it does photograph well.
Project #3: Sample Scarf for Bijou Basin Ranch
Since this was going to be a display piece and I had absolutely NO confidence in my skills, I became obsessed with perfect selvedges for this project. I think that it mostly paid off, too, and the person I wove this scarf for was quite pleased. Basically the lesson here was to go slow and don't tug too much on your weft yarn if you want really pretty edges. I also used a more slippery yarn than I was used to (a yak and bamboo blend yarn), which had a small bit of learning curve - so I actually wove a small sample swatch to help me get the hang of it while also practicing my selvedges. I highly recommend weaving a sample for any new-to-you yarn or fiber!
Project #4: Another Destash Scarf
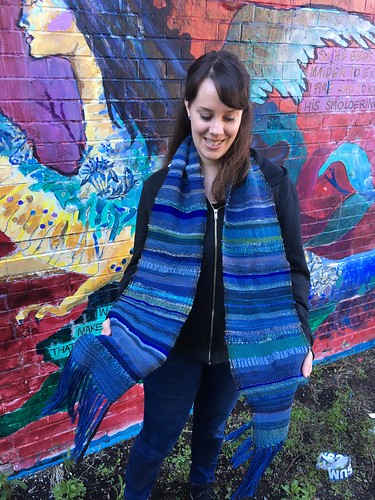
The reason I wanted to take up weaving was to blast through my ginormous yarn stash, so warping for another anything-goes destash scarf seemed like a good idea. This time, I decided to do a single color navy warp, which almost worked until I ran out of yarn. I ended up adding a few slots of black warp to either end, which resulted in an uncentered project on my loom, but otherwise was fine because it was at least the same brand and fiber content (see, learning!!) I wanted more of a Saori vibe for the weft, so I sorted through my stash and pulled out any blue or purple bit of yarn that I thought would look good together, and then I just pulled things at random to wind on my shuttle and weave with. I also experimented with adding in bits of fiber here and there, which I think had a pretty cool effect.
Project #5: Handspun Wrap
Yet again, I got ambitious and decided to make a wrap that was the full width of my loom using only handspun yarn for both the warp and the weft. While some people may caution against warping with handspun, I took care to choose a durable yarn that stood up to the process beautifully (hooray) - my only mistake was using up EVERY SINGLE SLOT on my heddle. Perhaps a more experienced weaver can do this and make it work, but I quickly ran into tension issues because the kraft paper I used to separate the warp kept crinkling up while I was winding everything onto the beam...which brings me to the most important lesson of all: always, always, ALWAYS have someone help you wind your warp onto the back beam! Trying to do it yourself it bananas, and results in totally wonky tension. Ask me how I know!
Project #6: Oh Look, Another Scarf
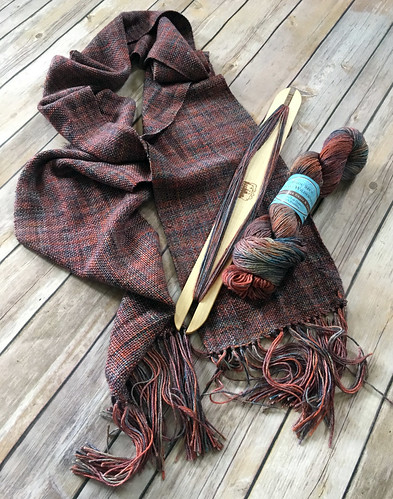
After making it through the wrap project, I returned to the safety of a scarf project. For this one, I used some black Berroco Vintage for the warp and then a huge skein of handspun yarn for the weft. To be honest, I think this might be the only project that went exactly as planned with no surprises, although I do wish I had made it just a touch longer and a bit narrower. Also, at this point I apparently stopped entering my projects into Ravelry, which is super-annoying now because WHERE ON EARTH ARE MY NOTES?! Oh yeah, there's another good lesson - take good notes, and put them somewhere that is easily discovered later on.
Project #7: Half of a Pillow
Over the summer, I had knit the front half of a pillow with some hand-dyed yarn and just couldn't bring myself to knit the other piece, so I decided to see if I could weave a piece that was roughly the same size to finish the project. I think I succeeded, although the pillow is still yet unassembled because I need to learn how to manage all the warp ends before removing the header.
Project #8: Magic Ball Scarf
This was a special assignment under the auspices of reviewing a yarn which contained several types of yarn (and even some ribbon), all in the same ball. I was given a sparkly chainette yarn to warp with that I was worried would be difficult to work with, but it ended up being totally awesome. On top of that, I got to see how a lot different kinds of yarn with varying textures wove up, which yielded some pleasant surprises: the mohair was lovely, and I ended up liking the section woven with a novelty yarn the best (!!). I also got to see how ribbon looks when used as the weft, which I had been curious about (spoiler alert, it's kind of cool!).
Project 9: Look Familiar?
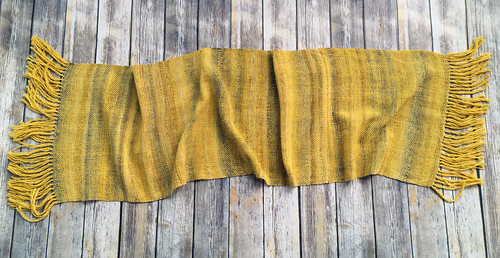
I had so much yarn left over from the Handspun Wrap that I decided to weave....you guessed it....another scarf! I bet you didn't see that coming!This project made me feel like I was starting to know what I was doing, and the lesson for me was that perhaps I should branch out.
Project 10: Weaving with Cotton
Taking the last lesson to heart, I warped for what I hope will become a washcloth or towel with some organic cotton yarn. I'm very close to finishing, but the craziness of the holidays has significantly reduced my weaving time. However, I bet I could be finished if I would JUST WEAVE - because it truly is SO FAST. I can weave a couple of inches in just 10 minutes, which is probably all I need to get this project off the loom. So, in 2018, remember: make time to weave every day....even if it's just 10 minutes.
I'll definitely be weaving (and learning!) more in 2018 and look forward to sharing my adventures with you. If you found this post helpful, I'd love it if you would share it on Pinterest. Thanks for stopping by!
Like this post? Pin it!
Project #2: Destash Scarf
I may have gone overboard with planning this project to make up for not planning the other one - I very painstakingly went through my bits and bobs of leftover worsted weight yarn to select the perfect gradients of blue and green with some black and grey for good measure. Unfortunately, I didn't take fiber content into consideration when planning my warp yarn, which resulted in some crazy tension issues (some of my warp yarns were extremely springy while others were quite the opposite). So, the next time I do a multicolored warp, you can bet it will be with yarns that are either the same brand or at least have similar fiber content. I also got overzealous with winding a succession of yarn colors onto my stick shuttle, which wasn't always an issue, but there were a few times I didn't like how the current selection wove up, which meant that I had to wind off the unused yarn and find something to sub in on the fly. I also made this scarf a tad narrower than I would have liked, but on the plus side, it does photograph well.
Project #3: Sample Scarf for Bijou Basin Ranch
Since this was going to be a display piece and I had absolutely NO confidence in my skills, I became obsessed with perfect selvedges for this project. I think that it mostly paid off, too, and the person I wove this scarf for was quite pleased. Basically the lesson here was to go slow and don't tug too much on your weft yarn if you want really pretty edges. I also used a more slippery yarn than I was used to (a yak and bamboo blend yarn), which had a small bit of learning curve - so I actually wove a small sample swatch to help me get the hang of it while also practicing my selvedges. I highly recommend weaving a sample for any new-to-you yarn or fiber!
Project #4: Another Destash Scarf
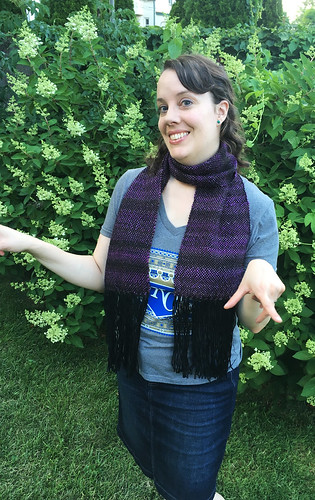
The reason I wanted to take up weaving was to blast through my ginormous yarn stash, so warping for another anything-goes destash scarf seemed like a good idea. This time, I decided to do a single color navy warp, which almost worked until I ran out of yarn. I ended up adding a few slots of black warp to either end, which resulted in an uncentered project on my loom, but otherwise was fine because it was at least the same brand and fiber content (see, learning!!) I wanted more of a Saori vibe for the weft, so I sorted through my stash and pulled out any blue or purple bit of yarn that I thought would look good together, and then I just pulled things at random to wind on my shuttle and weave with. I also experimented with adding in bits of fiber here and there, which I think had a pretty cool effect.
Project #5: Handspun Wrap
Yet again, I got ambitious and decided to make a wrap that was the full width of my loom using only handspun yarn for both the warp and the weft. While some people may caution against warping with handspun, I took care to choose a durable yarn that stood up to the process beautifully (hooray) - my only mistake was using up EVERY SINGLE SLOT on my heddle. Perhaps a more experienced weaver can do this and make it work, but I quickly ran into tension issues because the kraft paper I used to separate the warp kept crinkling up while I was winding everything onto the beam...which brings me to the most important lesson of all: always, always, ALWAYS have someone help you wind your warp onto the back beam! Trying to do it yourself it bananas, and results in totally wonky tension. Ask me how I know!
After making it through the wrap project, I returned to the safety of a scarf project. For this one, I used some black Berroco Vintage for the warp and then a huge skein of handspun yarn for the weft. To be honest, I think this might be the only project that went exactly as planned with no surprises, although I do wish I had made it just a touch longer and a bit narrower. Also, at this point I apparently stopped entering my projects into Ravelry, which is super-annoying now because WHERE ON EARTH ARE MY NOTES?! Oh yeah, there's another good lesson - take good notes, and put them somewhere that is easily discovered later on.
Project #7: Half of a Pillow
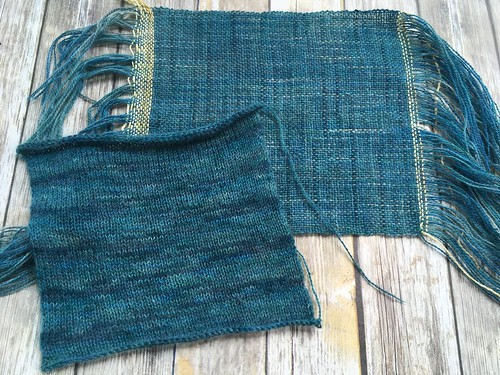
Over the summer, I had knit the front half of a pillow with some hand-dyed yarn and just couldn't bring myself to knit the other piece, so I decided to see if I could weave a piece that was roughly the same size to finish the project. I think I succeeded, although the pillow is still yet unassembled because I need to learn how to manage all the warp ends before removing the header.
Project #8: Magic Ball Scarf
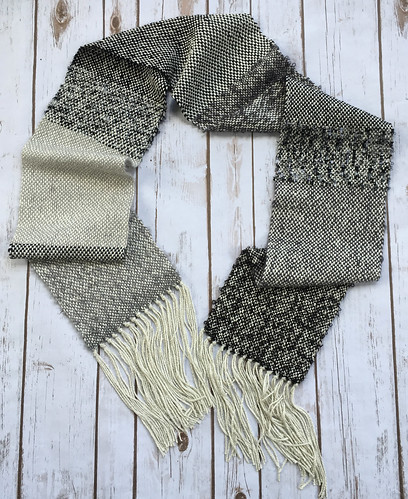
This was a special assignment under the auspices of reviewing a yarn which contained several types of yarn (and even some ribbon), all in the same ball. I was given a sparkly chainette yarn to warp with that I was worried would be difficult to work with, but it ended up being totally awesome. On top of that, I got to see how a lot different kinds of yarn with varying textures wove up, which yielded some pleasant surprises: the mohair was lovely, and I ended up liking the section woven with a novelty yarn the best (!!). I also got to see how ribbon looks when used as the weft, which I had been curious about (spoiler alert, it's kind of cool!).
Project 9: Look Familiar?
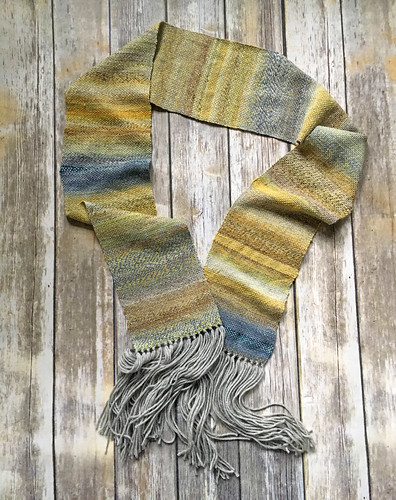
I had so much yarn left over from the Handspun Wrap that I decided to weave....you guessed it....another scarf! I bet you didn't see that coming!This project made me feel like I was starting to know what I was doing, and the lesson for me was that perhaps I should branch out.
Project 10: Weaving with Cotton
Taking the last lesson to heart, I warped for what I hope will become a washcloth or towel with some organic cotton yarn. I'm very close to finishing, but the craziness of the holidays has significantly reduced my weaving time. However, I bet I could be finished if I would JUST WEAVE - because it truly is SO FAST. I can weave a couple of inches in just 10 minutes, which is probably all I need to get this project off the loom. So, in 2018, remember: make time to weave every day....even if it's just 10 minutes.
I'll definitely be weaving (and learning!) more in 2018 and look forward to sharing my adventures with you. If you found this post helpful, I'd love it if you would share it on Pinterest. Thanks for stopping by!
Like this post? Pin it!
Comments
Post a Comment