
FO Friday: A Multi-Craftual Creation

Weaving with worsted weight yarn is a little tough,
but it's worth the effort!
I'm excited to finally post about a project I've been working on for a VERY long time! I originally began it last summer, when I thought I would be making it to give as a holiday gift. However, I decided to put it on the backburner til 2014. Earlier this year, I pulled it out of hibernation to finish it in time for my grandmother's 90th birthday (which was this past Wednesday).

There is no pattern for this pillow, as I made it up as I went along. It began with the Schacht Zoom Loom I got at the TNNA Trade Show last summer, which I thought would be a fun way to use up leftover bits of yarn. My first squares were made with sock yarn, since that is what I have the most of in my stash, but I decided that using a thicker yarn would make a pretty great pillow fabric. I used leftover worsted yarns to warp the Zoom Loom, then created the weft (woven part) with my own handspun yarn. It was a little difficult to weave with such thick yarn, but the fabric it created was absolutely lovely!
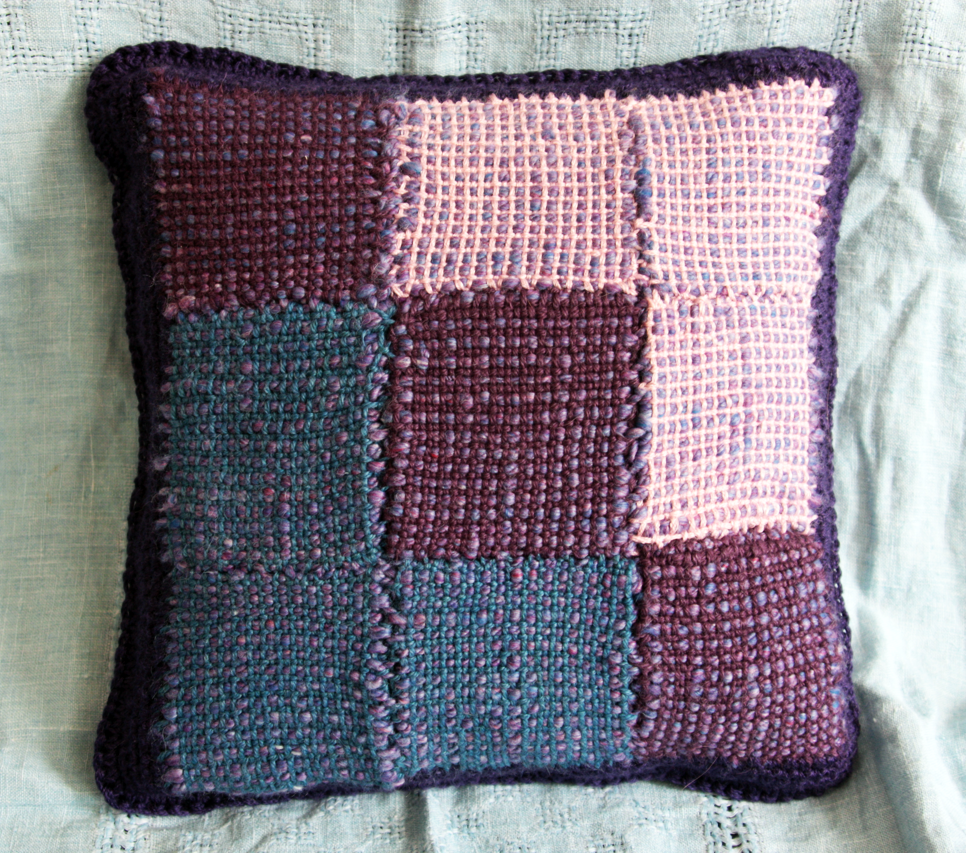
One of the many configurations I experimented with
prior to seaming!
I made 9 squares which I seamed together; then, using a contrasting yarn color, I began crocheting a border in single crochet, increasing two stitches at each corner on every round.
Once I had a piece that was big enough to cover the front of a 12" square pillow, I grabbed some yarn which had been in my stash for quite some time (more on that in a second) and began crocheting a square, also in single crochet. I guesstimated how many stitches to make a square similar in size to the woven squares when seamed together; once the piece was finished, I worked a border in a similar fashion to the front piece, except I used two different colors.
When the front and back were basically the same size, I used the working yarn to crochet them together, saving myself a little seaming. It was a little awkward to do this with a pillow form sandwiched between them, but it was totally worth it to spare myself the odious task of seaming.

I'm pretty thrilled with how it turned out! What's even more exciting is the story behind the light pink, magenta and deep purple yarns used in this project: they were all purchased back when I lived in Portland, OR at a little yarn store in the NW called Lint (which isn't there anymore). I'd originally bought this yarn, Berroco Softwist, to make a project for my grandmother! Obviously, it didn't happen, and it languished in my stash for nearly 10 years...only to be used in a project for the very same grandmother!
These 3 colors of Softwist were originally purchased almost
10 years ago in Portland, OR!

Thanks for stopping by this week - for FO Friday inspiration, visit the Tami's Amis blog.


Have a crafty weekend! 


Comments

Popular posts from this blog

Easy DIY: Beaded Vintage Snowflake Ornament Kits from Solid Oak Inc.

I was really excited to step outside of my comfort zone and try something new as part of my "Christmas in July" theme this month. The kind folks at Solid Oak Inc offered me a chance to review one of their Nostalgic Christmas beaded crystal ornament kits I couldn't resist. My tree is already full of ornaments I've inherited or been gifted from other family members and friends,  so these pretty crystal beaded ornaments will fit right in I think! I was super impressed with  this compact little kit , which includes everything needed to create three gorgeous vintage-style ornaments - just add a pair of round nose pliers (I found mine on Amazon for less than ten bucks).  The instructions had some fabulous tips for newbies like me; for example, it recommended sorting the beads and laying them out in order on a towel or beading mat to prevent them from rolling away. That may seem obvious, but I was totally ready to start beading on my kitchen table without a

What If I Didn't Add Heels?

Last weekend, I finished the first sock with my Waterlilies yarn , and just for yuks, I tried it on even though it was basically just a tube sock. Much to my surprise, it fit really well, even without a heel. Who knew? So, that got me thinking: what if I just didn't add the heels?  I never thought a tube sock would actually fit nicely, but I genuinely like the fit, so...why spend time to add the heels? As the saying goes, if it ain't broke, don't fix it.... Let's say I decide not to add heels once the second sock is done - there will still be placeholder yarn for the afterthought heels, as you can see above, so should I leave it in and just weave in the ends? Or should I remove it, put the live stitches back on needles and at least graft them together using more of the Waterlilies yarn? I plan on mulling all of this over as I knit the second sock, and I'd love to hear your opinions of what you think would look best (or if you think this whole "n

Overdyeing A Finished Knit

Even after just a few years of knitting or crocheting, you're bound to have some finished projects lying around that never get worn or used. After 10+ years of crafting, I have more than just "some" or "a few"....and with my ongoing quest to declutter my house this year, I've become obsessed with going through these forlorn projects and making some Big Decisions. Sometimes, they are perfectly fine and just need a new and loving home. Other projects may have not turned out quite right: there might have been some mistakes in the knitting that I thought I could live with, or the yarn was gorgeous but not well-matched to the pattern, or my  taste has drastically changed since I finished making the project...in any case, why on earth did I keep knitting?! Who knows, but I don't feel good about gifting anything that falls into this category to someone else. These projects have been relegated to the "frog pile" (or should I say, frog pond?), to b